Gemini Integration with Discord using OpenAI and Node.js
In this blog, we will work on integrating LLMs in Discord. The integration will enable you to use the Discord server as an LLM frontend.
Our implementation will use the OpenAI SDK and support any OpenAI-compatible models, along with local models using Ollama.
We will be using Node.js to connect our Discord bot to an LLM, which will listen for messages, process the message using the LLM of our choice (in this blog, we will be using Gemini), and reply with the generated response back to Discord.
Before diving into the implementation, let's examine what the integration flow looks like.
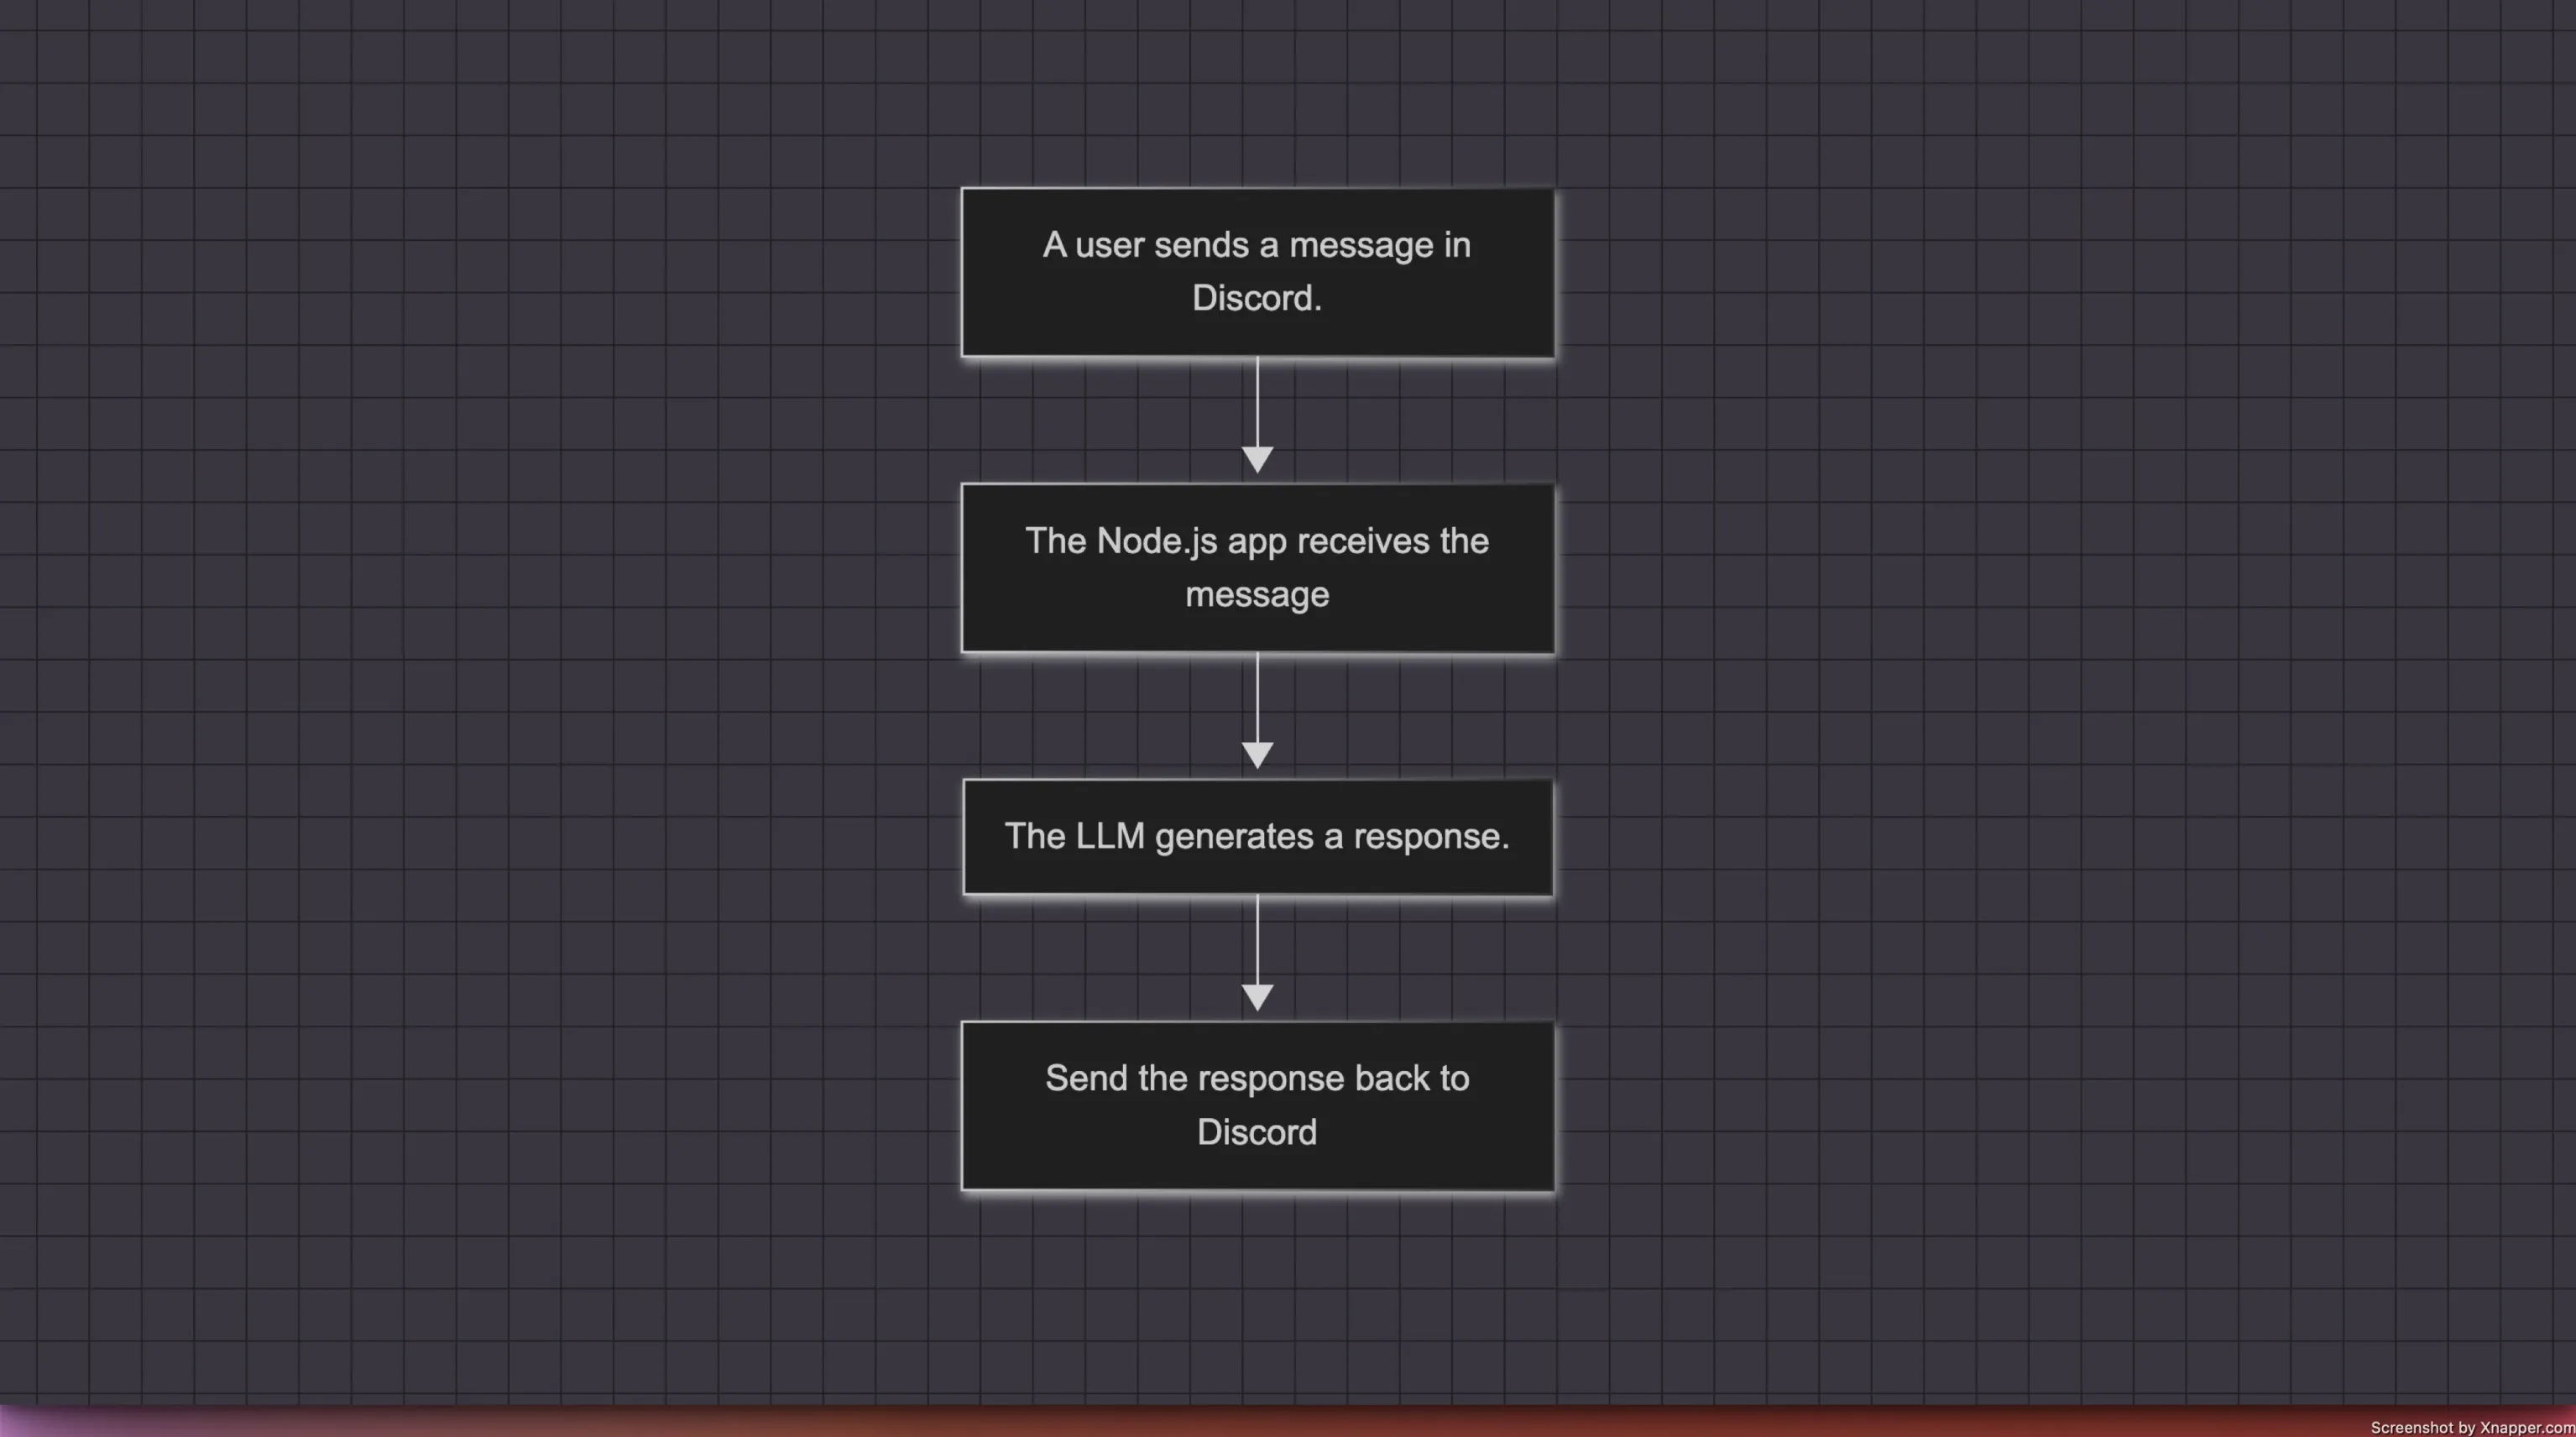
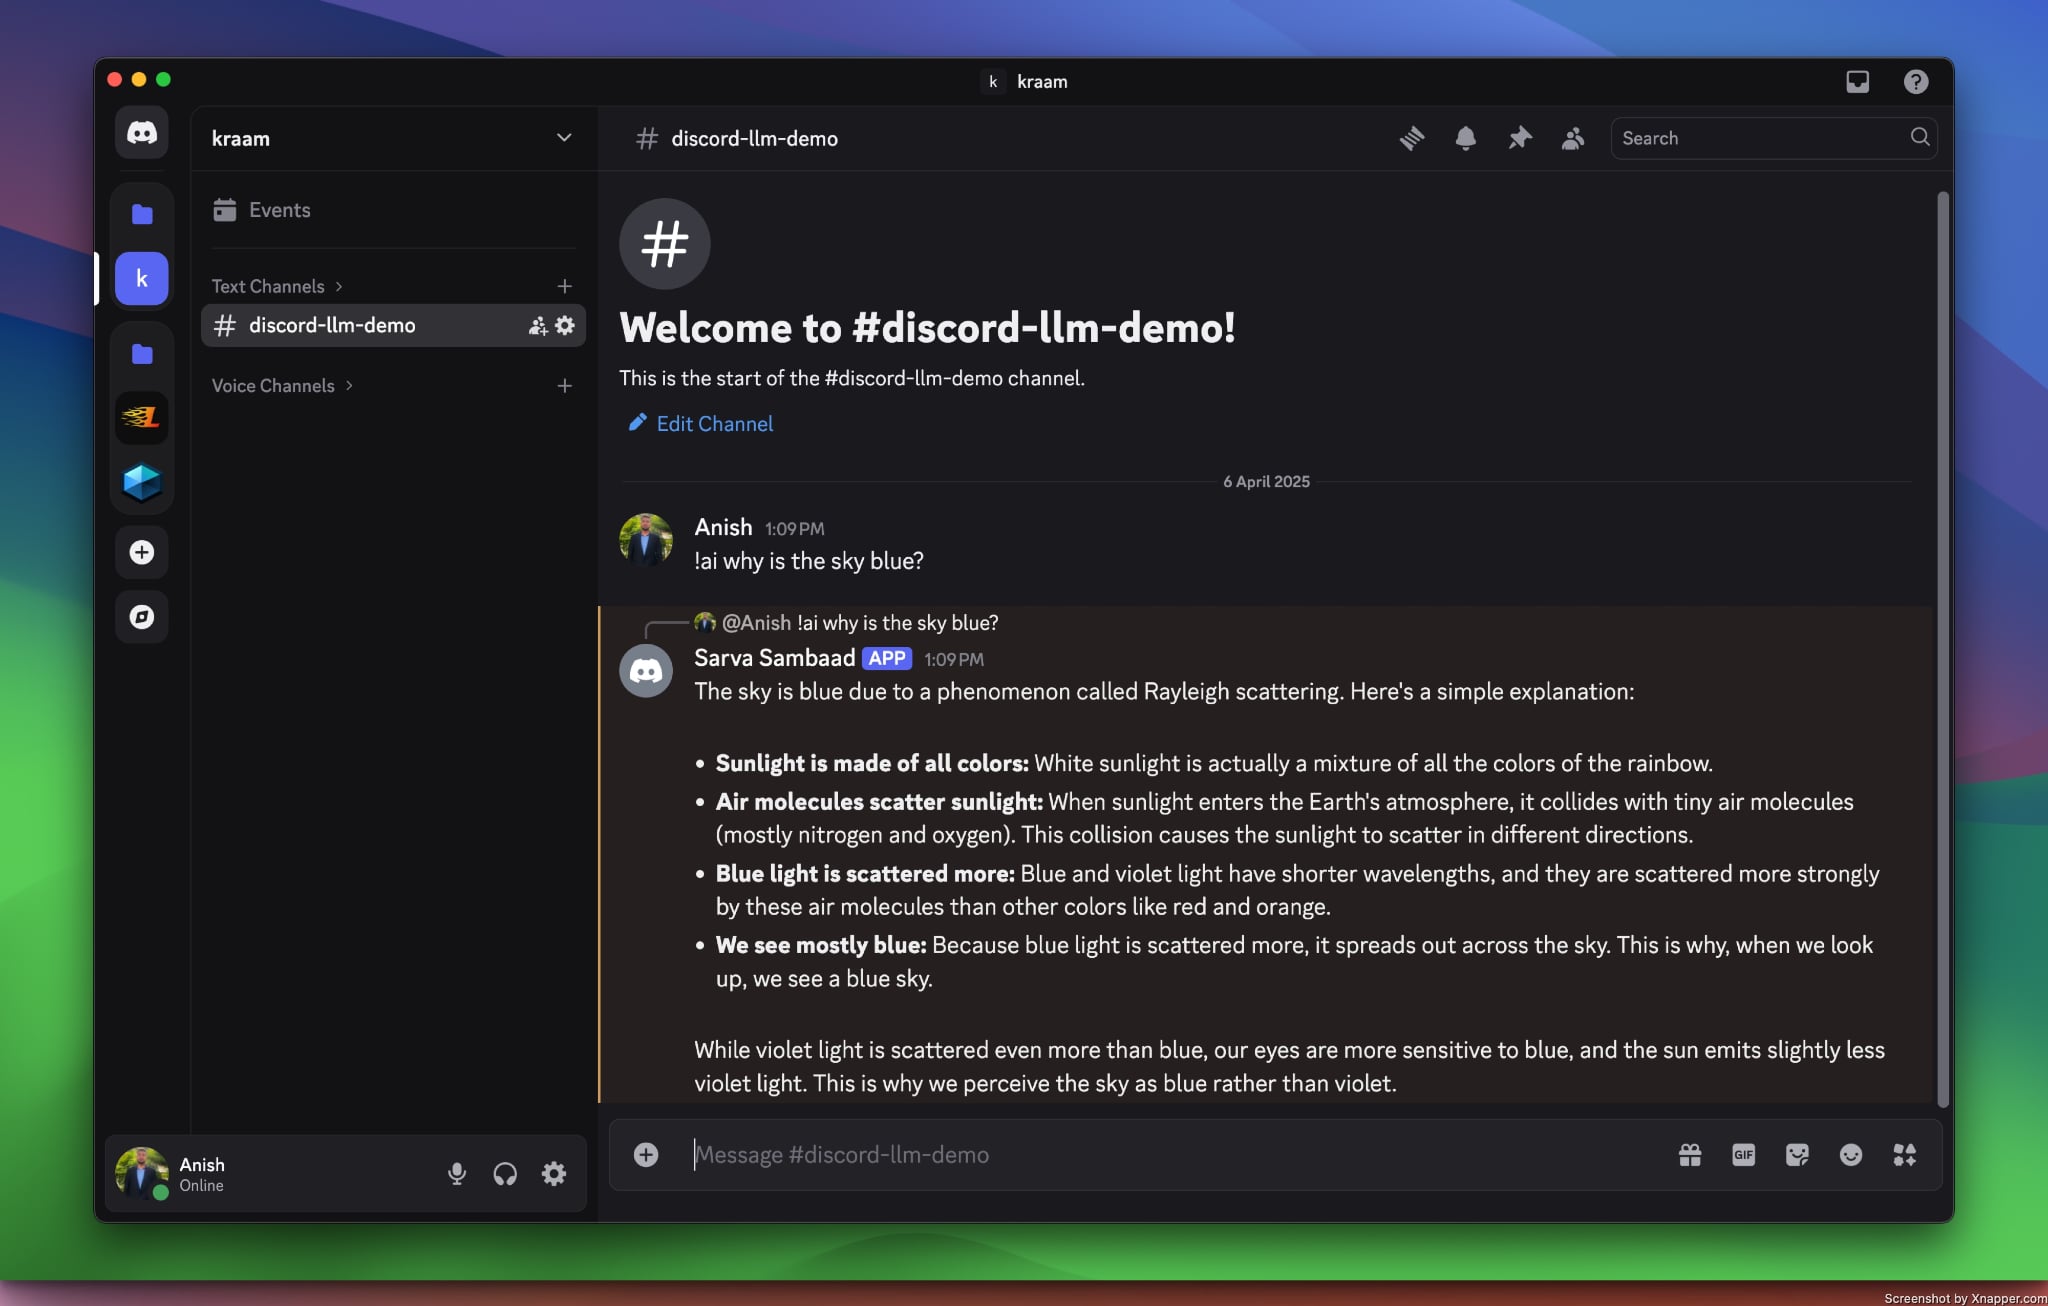
The process begins with the user sending a message to the Discord server. To avoid processing all messages, we'll only handle those that begin with a specific pattern. In our example, we'll process messages that start with !ai followed by a query. For instance: !ai why is the sky blue?
We will use the Discord.js library to build our Discord bot in Node.js. The Node program will listen for message events, allowing us to process the messages it receives.
Once a message is received, we'll process it using the LLM (Large Language Model) of our choice. In this case, we'll be using Gemini to generate a response. The generated response is then sent back to the Discord server.
Let's get started by implementing the Node server that handles and processes user messages. Before diving into the technical implementation, make sure you have an OpenAI-compatible API key and a Discord bot token ready.
If you need instructions on generating a Discord bot token, visit here.
We'll jump straight into implementing our bot's logic. However, if you need instructions on setting up a Node project, you can check out our other blog: How to Set Up a Node Project.
To keep the example implementation simple, we’ll set up our Node project with the following structure:
discord-llm-bot/
├── .env
└── bot.js
└── package.json
Let's first update the .env file with the required configuration and credentials.
DISCORD_BOT_TOKEN=your_discord_bot_token
DEFAULT_CHANNEL_ID=default_channel_to_send_bot_status_messages

OPENAI_API_KEY=openai_compatible_api_key
OPENAI_BASE_URL=openai_compatible_api_base_url
OPENAI_MODEL=model_name_eg_gemini-2.0-flash
To use local models with Ollama, update OPENAI_BASE_URL to http://localhost:11434/v1 and leave OPENAI_API_KEY empty.
Once we've updated the environment file, it's time to implement the logic required to integrate the LLM into our Discord server.
In the bot.js file, make the following changes as discussed below:
import 'dotenv/config'
import { Client, GatewayIntentBits } from 'discord.js'
import { OpenAI } from 'openai'
We are importing the necessary packages required to integrate the LLM into our Discord server.
discord.js is a Node module that allows us to interact with the Discord API, whereas the OpenAI library provides access to their REST API.
Now, we’ll set up both the OpenAI client and the Discord client.
- OpenAI Client Setup
We’ll create a new instance of the OpenAI client, passing in the API key and base URL to authenticate and connect to the OpenAI API. - Discord Client Setup
Similarly, we’ll initialize the Discord client with specific intents. The intents array defines the types of events the bot will listen to, such as receiving messages, interacting with guilds, and accessing message content.
const openai = new OpenAI({
  apiKey: process.env.OPENAI_API_KEY,
  baseURL: process.env.OPENAI_BASE_URL,
})

const client = new Client({
  intents: [
    GatewayIntentBits.Guilds,
    GatewayIntentBits.GuildMessages,
    GatewayIntentBits.MessageContent,
  ],
})
Since we don’t want to process every message sent to the Discord server, we’ll set a prefix to a specific value. We will then only process messages that begin with this defined prefix. In this case, we’ll only process messages that start with !ai. For example, !ai why is the sky blue?.
const BOT_PREFIX = '!ai'
Once our Node server receives a ready event from the Discord client, we will send a message to the default channel, confirming that the bot is online and ready to process user messages.
client.once('ready', () => {
  console.log(`Bot is online as ${client.user.tag}`)

  const channel = client.channels.cache.get(process.env.DEFAULT_CHANNEL_ID)
  if (channel) {
    channel.send('[ AUTO ] Bot is now online and ready to assist! 🚀')
    channel.send(
      '[ AUTO ] To start chatting with the bot, please begin your message with !ai followed by your query.'
    )
  }
})
Once we receive the messageCreate event, we will first check whether the event should be processed or discarded. If the event is triggered by the bot itself or if the message content does not start with the defined BOT_PREFIX, we will discard the event and return without processing the request.
client.on('messageCreate', async (message) => {
  if (message.author.bot || !message.content.startsWith(BOT_PREFIX)) return
})
When the received event is meant to be processed, we will immediately send a typing status to the Discord channel from which the message was sent and then proceed with processing the request.
client.on('messageCreate', async (message) => {
  // ...
  await message.channel.sendTyping()
  const query = message.content.slice(BOT_PREFIX.length).trim()
  if (!query) return message.reply('Please provide a prompt!')
  // ...
})
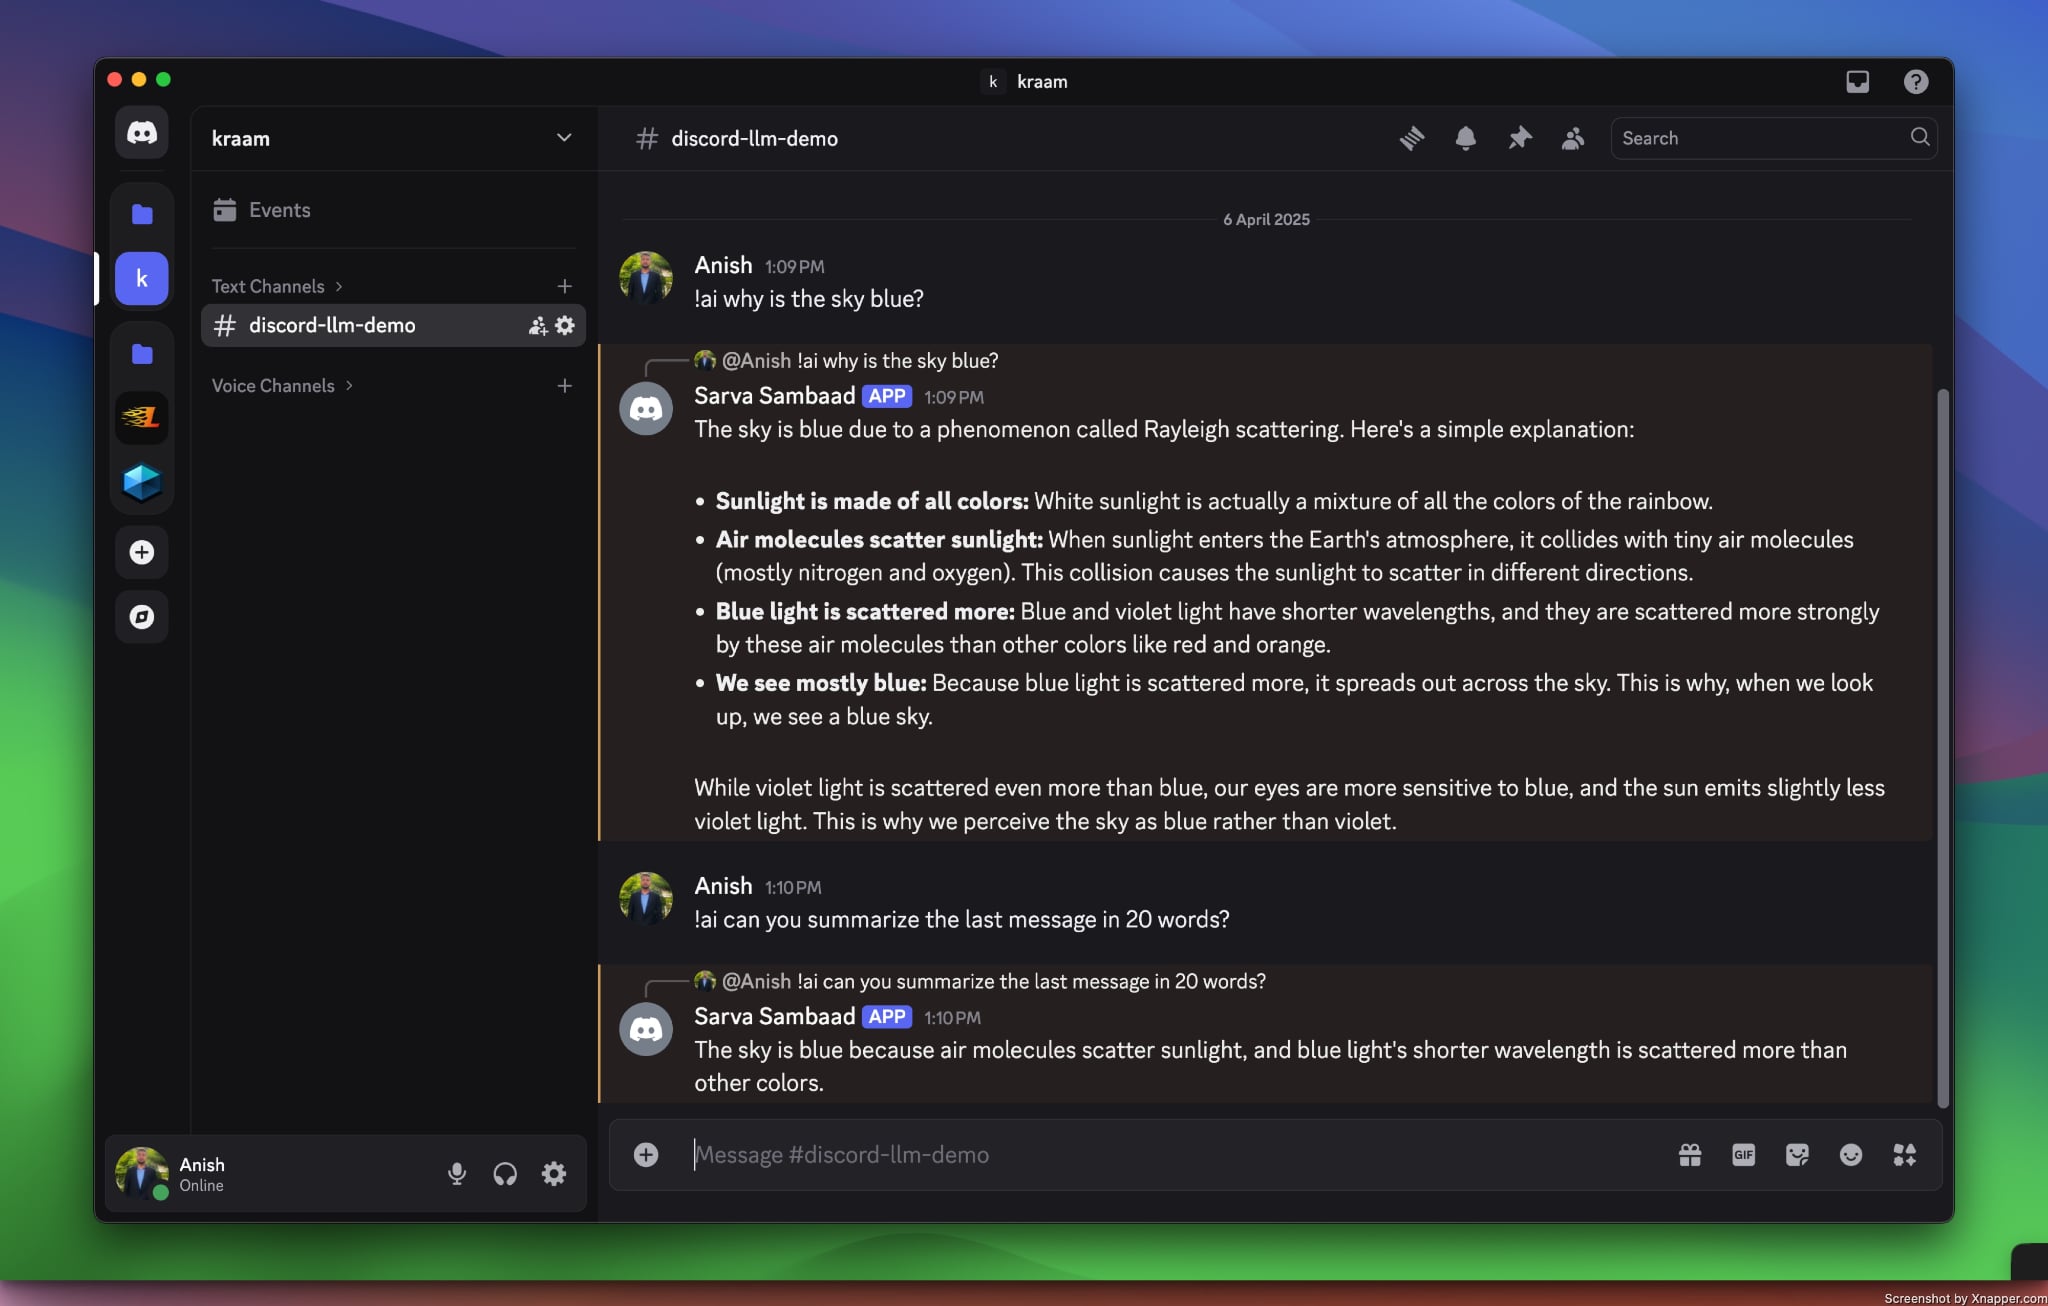
To maintain the conversation context and generate appropriate responses, we will fetch the last 10 messages from the channel where the bot was called. These messages will be structured using different roles, such as user, system, or assistant, to ensure the interaction remains coherent.
We also clean up the message history to avoid hitting the context window limitation and to ensure a higher quality response. In our case, the bot’s status messages such as online, disconnected, or error are prefixed with AUTO and are removed before sending the context to the LLM.
client.on('messageCreate', async (message) => {
  // ...
  const messages = await message.channel.messages.fetch({ limit: 10 })
  const messageHistory = messages.reverse().reduce((history, msg) => {
    if (msg.author.id !== client.user.id) {
      history.push({ role: 'user', content: msg.content })
    } else {
      history.push({ role: 'assistant', content: msg.content })
    }
    return history
  }, [])

  messageHistory.push({ role: 'user', content: query })
  messageHistory.unshift({
    role: 'system',
    content: `
    You are a helpful AI assistant specializing in providing clear, concise, and polite answers to wide range of questions.
    `,
  })
  const cleanHistory = messageHistory.filter(
    (message) => !message.content.startsWith('[ AUTO ]')
  )
  // ...
})
Now that we have a clean message history and everything else in place, we will call OpenAI's chat completion API using the create method to generate a response.
client.on('messageCreate', async (message) => {
  // ...
  try {
    const response = await openai.chat.completions.create({
      model: process.env.OPENAI_MODEL,
      messages: cleanHistory,
      max_tokens: 1500,
    })

    const replyText =
      response.choices[0]?.message?.content || 'Unable to generate a response.'

    await message.reply(replyText)
  } catch (error) {
    console.error('Error:', error)
    await message.reply('[ AUTO ] There was an error generating a response.')
  }
  // ...
})
The generated response is then sent back to the Discord channel, allowing the bot to reply to the user’s query.
To view the full source code, please visit the GitHub repository here.
With this, we come to the end of our blog. I hope this guide proves helpful to anyone exploring the field of Generative AI. The possibilities are vast, and you can further enhance your LLM-based Discord bot by integrating Retrieval-Augmented Generation (RAG) and tool calling functionalities.