GitHub Assistant Integration with Tool Calling
In the blog we will discuss:
Tool Calling Introduction
Tool calling extends the capabilities of AI agents by enabling models to interact with external data sources such as databases, APIs, or scripts.
In this blog, we'll examine how AI agents can go beyond just retrieving knowledge to taking actions.
Tool calling enhances AI agents by allowing them to access real-time information and perform actions. They can fetch live stock prices, send emails, or create an issue on GitHub.
How Does Tool Calling Work?
Triggering the tool call, generating the tool call request, executing the tool call, and processing the request are the key components of tool calling.
The LLM model detects when a user's query requires external data (knowledge base) or an action. Once the model detects that an action is required, the AI agent formats a request that includes the tool's name, parameters, and a description. This is often done using structured JSON data.
The external tool, such as an API, database query, or script, processes the request and returns the information after processing. The LLM then uses the tool's response to generate a reply in natural language.
Tool Calling Implementation
While the applications of tool calling are vast, ranging from a simple web search to performing secure transactions, for demonstration purposes, we will examine a tool that dynamically creates and lists GitHub issues for a project.
To keep it simple, we'll be using Ollama, NodeJS and the GitHub API to set up a demo project for tool calling implementation.
We’ll set up a NodeJS project in the following structure:
ai-tool-calling/
├── index.js
├── tools.js
└── .env
└── package.json
We'll use the dotenv, ollama, and node-fetch NPM packages. To install the required packages, run:
npm i dotenv ollama node-fetch readline-sync
dotenvis used to load environment variables from a.envfile.ollamapackage is used interact with Ollama's LLMs.node-fetchis used to make HTTP requests to GitHub APIs.readline-syncis used to enable synchronous user input.
Once the project is set up and the packages are installed, let's update the .env file and add the GitHub Personal Access Token to safely use throughout our codebase.
GITHUB_TOKEN=github_personal_access_token
Once you've updated the .env file, head over to the tools.js file and add a function to create GitHub issues.
import 'dotenv/config'
import fetch from 'node-fetch'

const GITHUB_TOKEN = process.env.GITHUB_TOKEN
const GITHUB_REPO = 'anishghimire862/ai-tool-calling'
We're importing dotenv and node-fetch and defining the GitHub token and repository details.
The repository is where we will be creating and listing GitHub issues.
Let's define the function responsible for creating new GitHub issues.
// imports...

export async function createGitHubIssue({ title, body, labels }) {
  if (!GITHUB_TOKEN || !GITHUB_REPO) {
    throw new Error('Missing GitHub token or repository details in .env')
  }

  const response = await fetch(
    `https://api.github.com/repos/${GITHUB_REPO}/issues`,
    {
      method: 'POST',
      headers: {
        Authorization: `token ${GITHUB_TOKEN}`,
        Accept: 'application/vnd.github.v3+json',
        'Content-Type': 'application/json',
      },
      body: JSON.stringify({
        title,
        body,
        labels: labels || ['bug'],
      }),
    }
  )

  const data = await response.json()
  if (response.ok) {
    return `GitHub issue created: ${data.html_url}`
  } else {
    throw new Error(`GitHub API error: ${data.message}`)
  }
}
The above-defined createGitHubIssue() function takes title, body, and labels as parameters and creates a GitHub issue with the provided content in the specified repository.
Let's write some logic in our index.js file and start working on building our GitHub Assistant CLI chatbot.
import { question } from 'readline-sync'
import { Ollama } from 'ollama'
import { listGitHubIssues, createGitHubIssue } from './tools.js'
async function startCLI() {
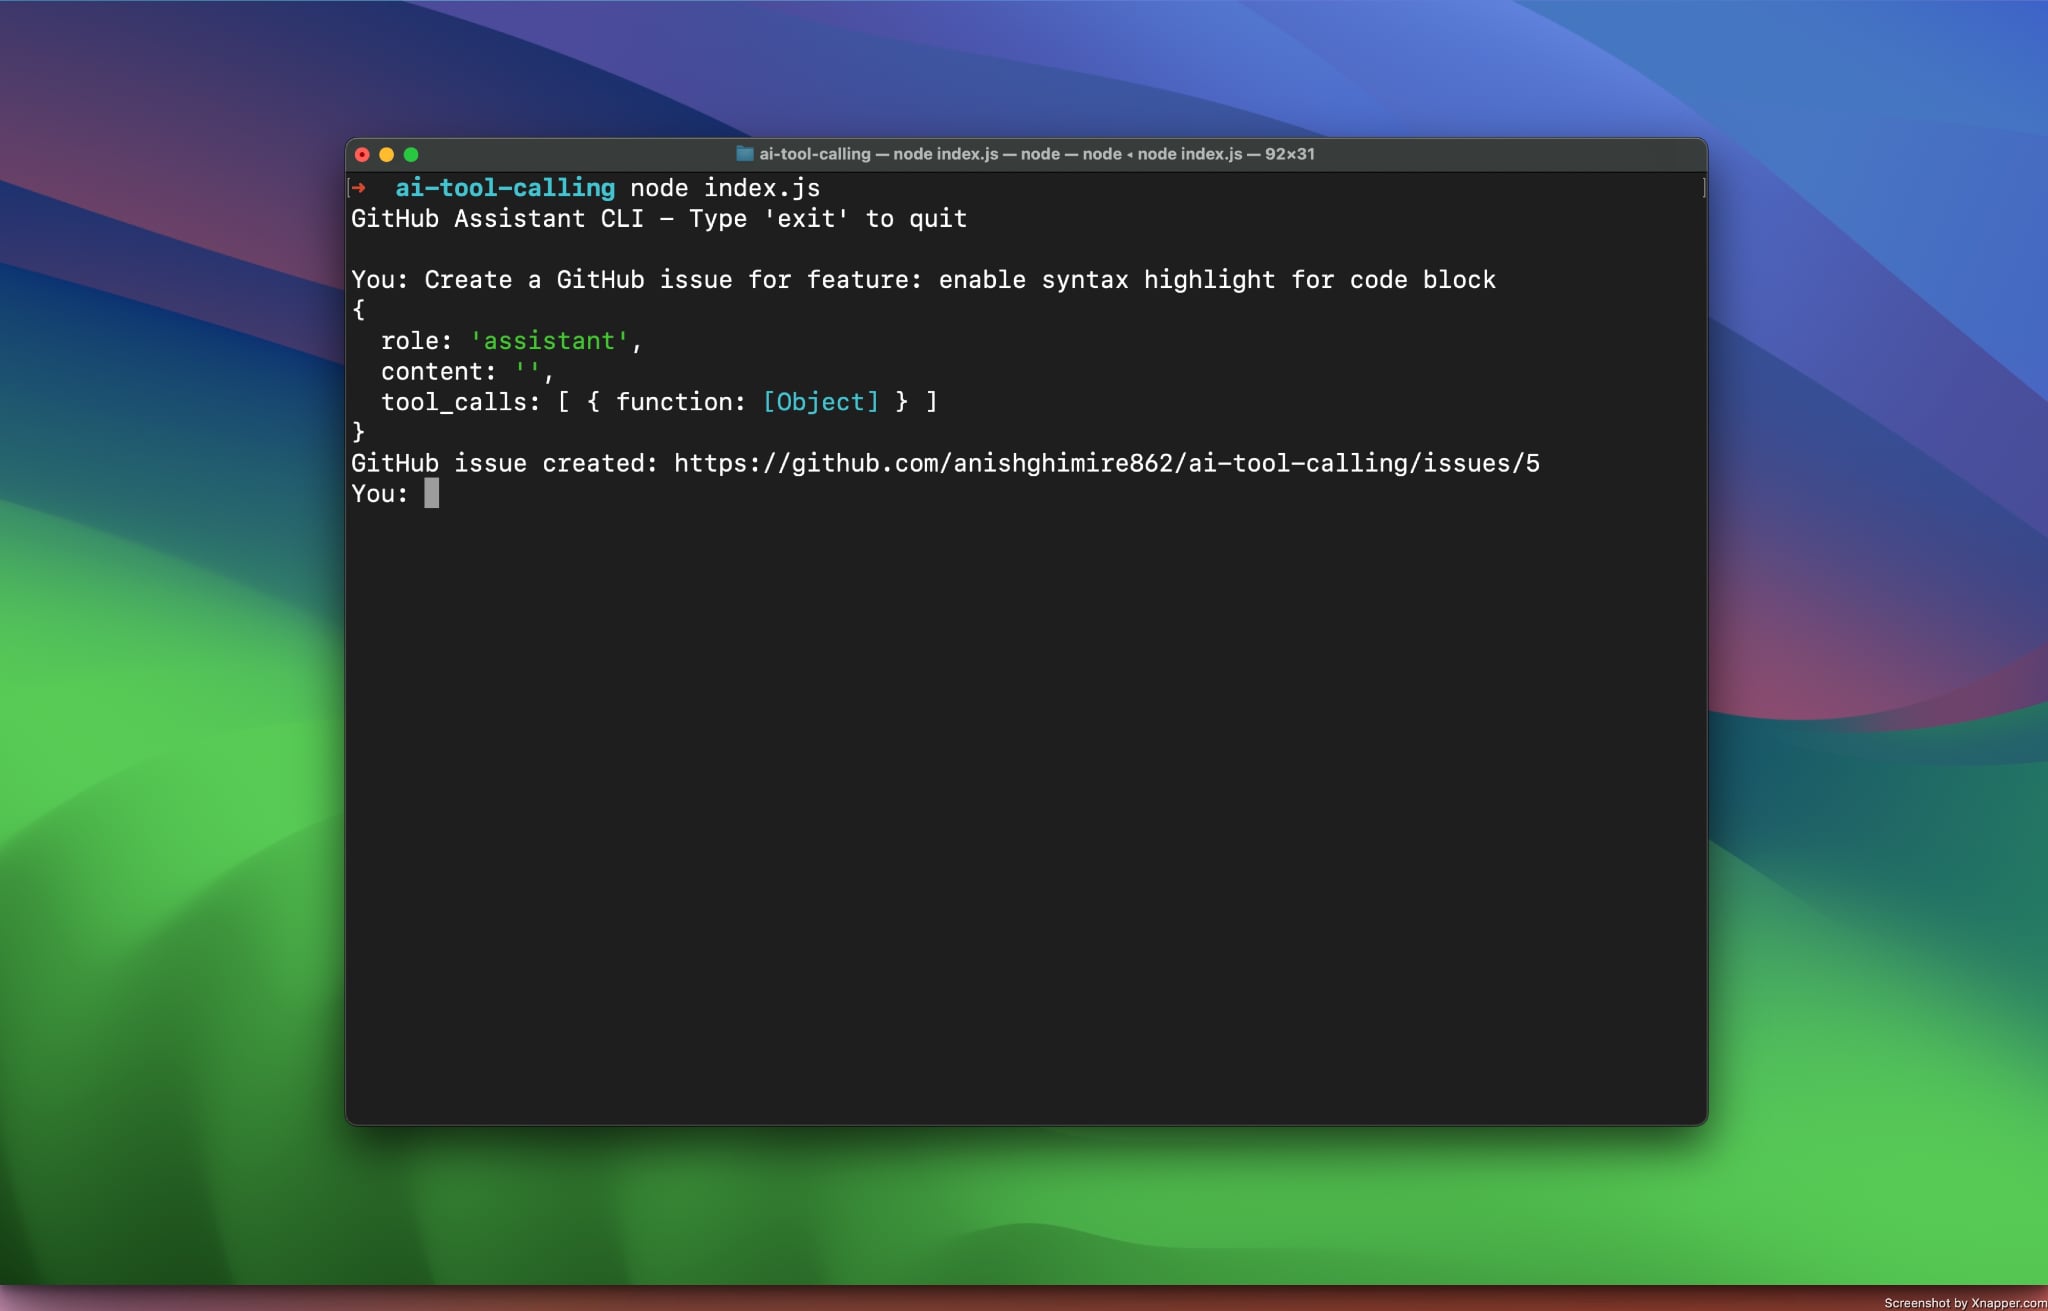
console.log("GitHub Assistant CLI - Type 'exit' to quit\n")
while (true) {
const userInput = question('You: ')
if (userInput.toLowerCase() === 'exit') break
await chatWithAI(userInput)
}
console.log('👋 Goodbye!')
}
startCLI()
In the above code snippet, we have set up our CLI application to allow interaction through the command line. The program runs an infinite loop to continuously listen for user input until the user types "exit." To process user queries using an LLM, the program calls the chatWithAI(userInput) method, which we will discuss next.
async function chatWithAI(userInput) {
  const response = await client.chat({
    model: 'llama3.1',
    messages: [
      {
        role: 'system',
        content: `You are a GitHub assistant. Use the tools 'listGitHubIssues' to list issues or 'createGitHubIssue' to create a new issue when the user requests it.`,
      },
      {
        role: 'user',
        content: userInput,
      },
    ],
    stream: false,
    tools: [
      {
        name: 'listGitHubIssues',
        description: `Lists open GitHub issues in the repository.`,
        parameters: {},
      },
      {
        name: 'createGitHubIssue',
        description: 'Creates a GitHub issue with title, body, and labels.',
        parameters: { title: 'string', body: 'string', labels: ['string'] },
      },
    ],
  })

  const toolCalls = response.message?.tool_calls

  if (toolCalls) {
    for (const toolCall of toolCalls) {
      const toolFunction = toolCall.function
      if (toolFunction.name === 'listGitHubIssues') {
        try {
          const issues = await listGitHubIssues()
          console.log('Open Issues:\n', issues)
        } catch (error) {
          console.error('Error:', error.message)
        }
      }
      if (toolFunction.name === 'createGitHubIssue') {
        try {
          const result = await createGitHubIssue(toolFunction.arguments)
          console.log(result)
        } catch (error) {
          console.error('Error:', error.message)
        }
      }
    }
  } else {
    console.log('AI Response:', response.message.content)
  }
}
The chatWithAI() function processes user queries using an LLM (Large Language Model) and interacts with GitHub to create and list issues. In our example, we're using the llama3.1 model with Ollama's NPM package.
Not all models support tool calling. To find out which models do, you can visit.
To enable tool calling, we're using the chat method provided by Ollama. The generate method doesn't support tool calling because it is designed for single-shot text generation.
const response = await client.chat({
  // ...
})
We've defined the messages array to structure the conversation context. The system message serves as an instruction manual for the AI, while the user message contains the user's query.
messages: [
  {
    role: 'system',
    content: `
      You are a GitHub assistant. Use 'listGitHubIssues' to list issues or 'createGitHubIssue' to
      create a new issue only when explicitly requested (e.g., 'list issues' or 'create an issue').
      For casual greetings or unclear inputs, respond conversationally without invoking tools.
    `,
  },
  {
    role: 'user',
    content: userInput,
  },
],
We'll provide the list of tools via the tools field.
tools: [
  // other tools...,
  {
    name: 'listGitHubIssues',
    description: `Lists open GitHub issues in the repository.`,
    parameters: {},
  },
]
Now, if the model being used supports tool calling and detects that a tool call is required, the model generates a response with a tool_calls field.
const toolCalls = response.message?.tool_calls

if (toolCalls) {
  for (const toolCall of toolCalls) {
    const toolFunction = toolCall.function
    if (toolFunction.name === 'listGitHubIssues') {
      try {
        const issues = await listGitHubIssues()
        console.log('Open Issues:\n', issues)
      } catch (error) {
        console.error('Error:', error.message)
      }
    }
  }
} else {
  console.log('AI Response:', response.message.content)
}
If we have the response.message?.tool_calls value, it means the LLM has decided to use a tool. We then iterate through the available tools and process the user's query accordingly. For instance, if the tool_calls includes listGitHubIssues, we'll invoke the listGitHubIssues method.
That's it! We've reached the end of the blog. Now, we have a command-line app that functions as a GitHub Assistant and helps us manage GitHub issues. To view the full source code, you can visit the repo